Project Management
Overview
Teaching: 25 min
Exercises: 5 minQuestions
How can I manage the development of my code?
Objectives
Explain how project boards work.
Explain how to set up a Kanban board on GitHub.
Discuss strategies for using a Kanban board.
Explain what a fork is, and how to fork a repository.
Developing academic software is a project, and most projects (software and non-software alike!) consist of multiple tasks. Keeping track of the list of tasks you have to do, and how far you are through each, quickly becomes a non-trivial task itself. Without a good framework, it can be hard to keep track of what’s done, or what needs doing, and particularly hard to convey that to others or share the responsibilities out.
Project boards
A project board (or kanban board, from the japanese for a card) is a tool for keeping track of all the different components of a project, and what their current status is. They do this using columns and cards - you break your project down into tasks which you write on cards, then move them between columns that describe the status of each task. Cards are usually small, descriptive and self-contained tasks that build on each other - think “Add reader for .csv files” instead of “Get input working”. Breaking a project down into clearly-defined tasks makes it a lot easier.
In industry, they often use formal project management styles for their boards with specific columns and usages, but we’re going to use a simple, flexible format - not least because the more complicated your project board gets, the harder it is for you to get your collaborators to use it…
To GitHub
There’s a lot of sites that host project boards. For non-software projects like thesis-writing or organising conferences, you might use Trello, but repository hosting sites like GitHub and GitLab have built-in project boards that interact with the other features of the site, so we’re going to use them (though other tools like Jira also offer this functionality). This episode will use GitHub as an example, but GitLab has almost identical functionality.
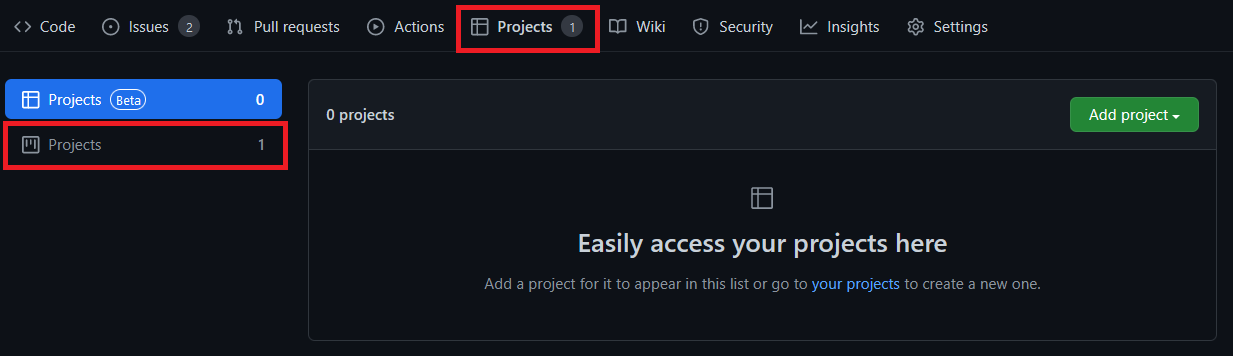
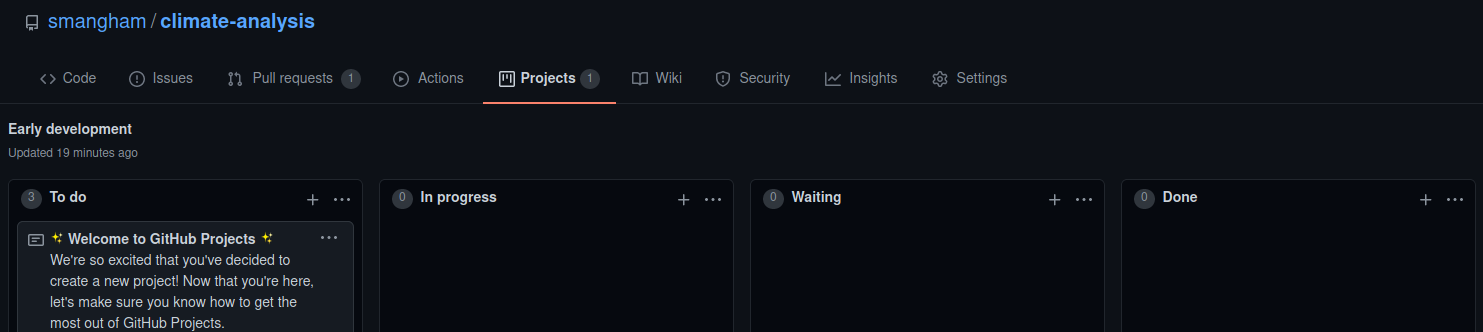
First, we’ll go to our repository’s Project tab. GitHub offers two types of project - we’ll be using the classic one, that’s linked to the repository. Select the ‘Project’ (not beta!) tab:
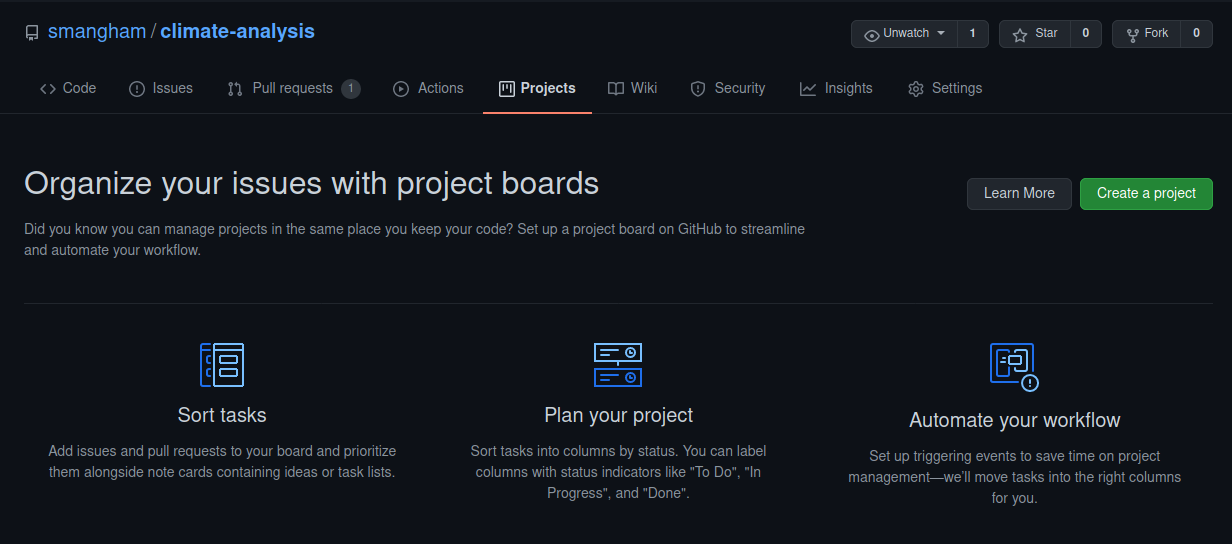
Then from there, click Create a new project. A repository can have multiple project boards on it - for example, if multiple PhD students have their own project working on a code, each can have a project board for their own changes, or you can create a new board for each paper.
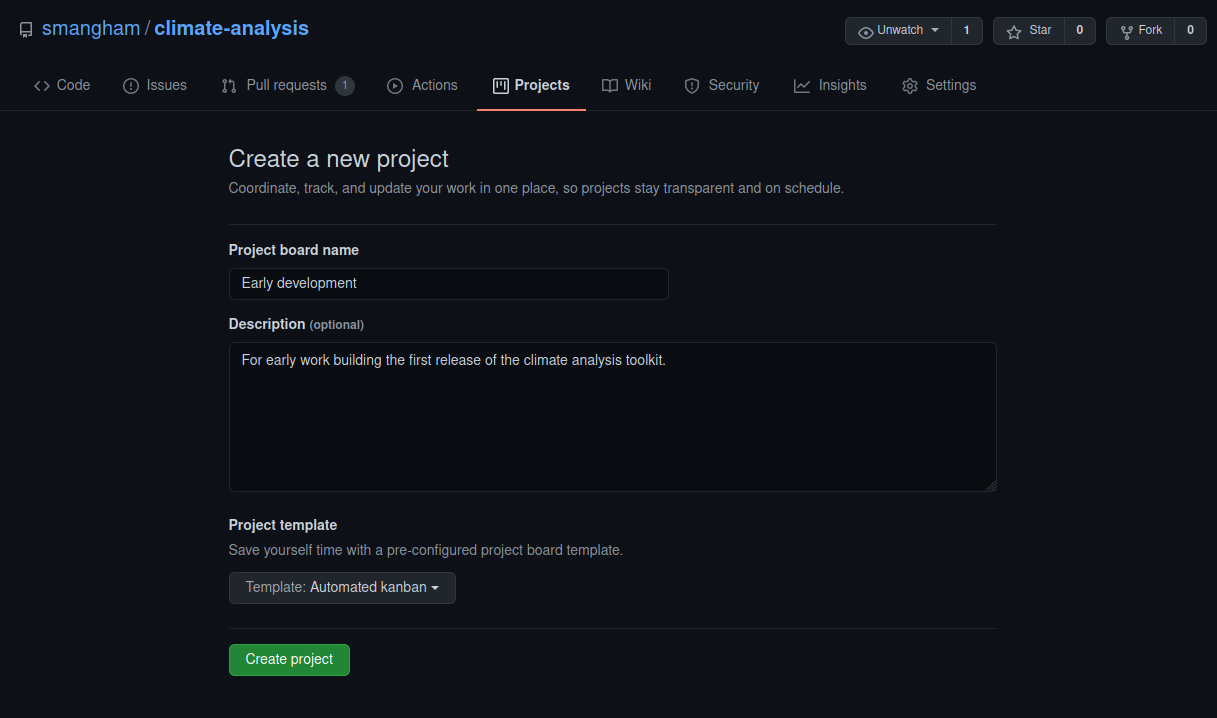
First, we need to give our project a name, e.g. “Early development”. Then, we can think about the columns.
Columns
Almost all styles of board have three ‘basic’ columns, with pretty self-explanatory names:
- To Do
- In Progress
- Done
GitHub provides template boards that automatically have those columns- and more, it has automated templates. If you add a pull request to the board, it can automatically move it to ‘Done’ for you when you merge it. We’re going to select the Automated kanban template, then Create project.
One common extra column is On hold or Waiting. If you have tasks that get held up by waiting on other people (e.g. to provide you with data or respond to your questions) then moving them to a separate column makes their current state clearer. We’re going to add a Waiting column, and drag it in-between In Progress and Done (you might have to scroll over a bit to see the Add column button!):
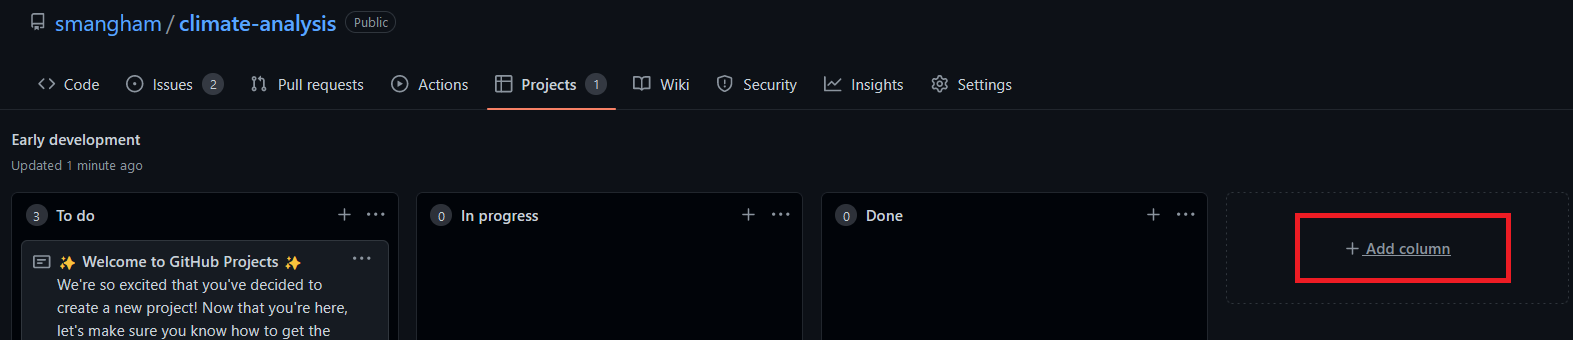
Now we’ve got our board fully set up:
Cards
One of the advantages of using GitHub or GitLab to host your project board is the integration with issues. You can easily add issues to your project board, to keep track of how they’re progressing.
You can create cards on the project board, or you can import existing issues. Let’s add the issue we created last episode to the To Do column - click Add card and drag it over.
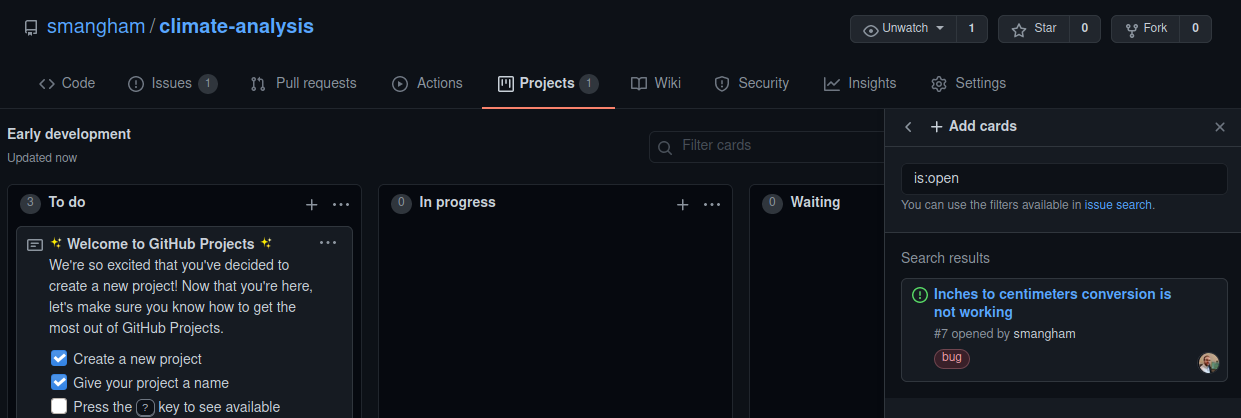
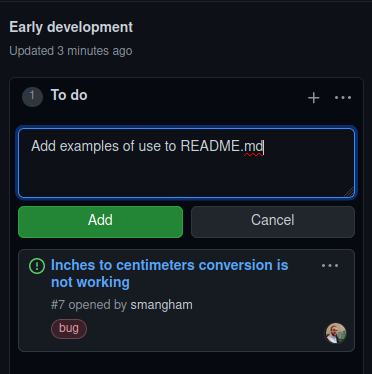
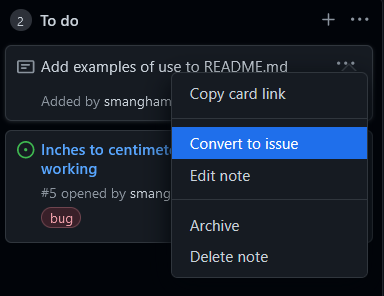
We can also create a card without an issue. The repo currently doesn’t tell people how to use the code- it needs an example. So let’s clear out the default cards GitHub adds using the … button and create a new one in To Do using the + button.
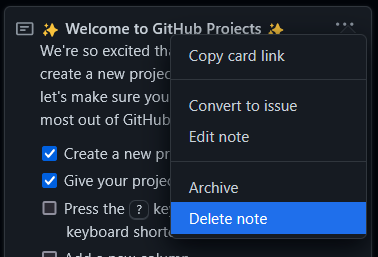
Notes can have detailed content like checklists, but that only goes so far. Later on you might want to convert the card to an issue so you can add labels or write detailed comments. Fortunately, you can use the Convert to issue option you just saw in the … menu. It’s often a good idea as you can use the comments section on the issue to write everything you tried- and, importantly, everything that failed for future reference.
Sometimes, a card you thought was simple and self-contained might turn out to be a bigger task than you thought. In that case, it’s sensible to create new cards that reference the one they broke off from.
Our project board is looking a little thin, but for an example full one check out the plotting library Plotly.
Exercise: Labelling
You can see that your issue card has a ‘bug’ label, but the one you made has no labels. Convert your new card to an issue, and add the Documentation label to it.
Solution
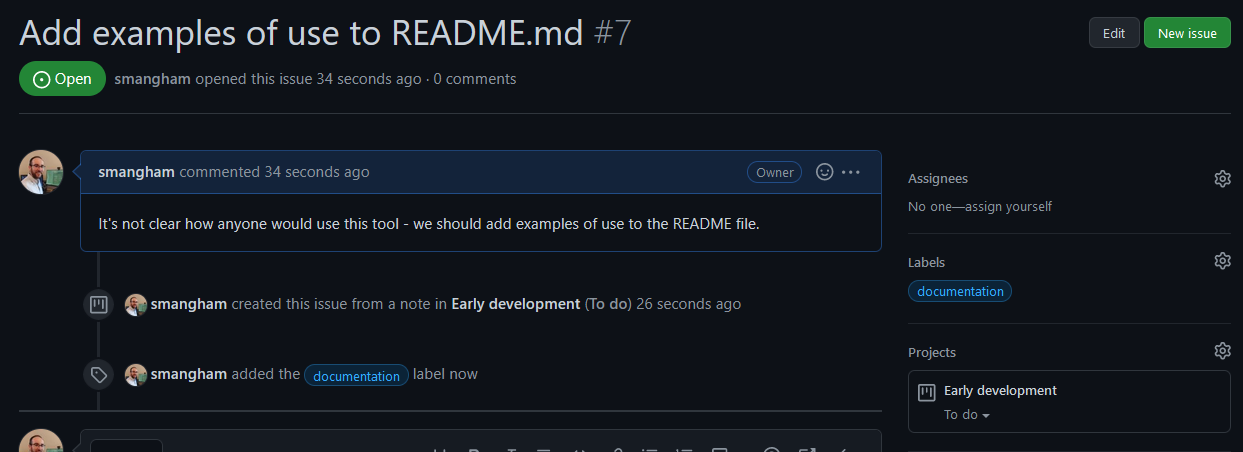
We convert the card to an issue, and add a quick description:
Once we’ve made the issue, we can follow the link to see it and add the Documentation label. It’ll show us that the issue is linked to our project board as well:
Prioritisation
Once your project board has a large number of cards on it, you might want to begin priorisiting them. Not all tasks are going to be equally important, and some will require others to be completed before they can even be begun. Common methods of prioritisation include:
- Vertical position: The vertical arrangement of cards in a column represents their importance. High-priority bugs go to the top of To Do, whilst tasks that depend on others go beneath them. This is the easiest one to implement, though you have to remember to correctly place cards when you add them.
- Priority columns: Instead of a single To Do column, you have two or more- a To Do: Low Priority and a To Do: High Priority. When adding a card, you pick which is the appropriate column for it. You can even add a Triage column for newly-added issues that you’ve not yet had time to classify. This format works well for project boards devoted to bugs.
- Labels: If you convert each card into an issue, then you can label them with their priority- GitHub lets you create new labels and set their colour. Green low, orange medium and red high priority labels make for a very visually clear indication, but require the most admin as each card has to be an issue to receive a label.
Prioritisation
Currently, we don’t really have enough cards to prioritise. Create a new card named “High priority”, and using one of the prioritisation schemes arrange your board so it’s the most important.
Advanced Schemes
Whilst you can prioritise your tasks using simple schemes, more advanced ones exist in industry. MoSCoW (Must, Should, Could, Won’t) is one such scheme, which splits your tasks up into no more than 60% must-have features, and no less than 20% could-have features.
If your must-have features take longer than expected to implement, you have a pre-made list of what you can cut to complete the project on-time. If you have a relatively well-defined project that needs to be completed to a strict deadline, consider looking into MoSCoW.
Feature-branch workflows
The Feature-branch workflow is a common way of structuring how you develop your code using version control, that sites like GitHub make easy to apply.
I Know This
If you’ve attended some previous training that’s covered feature-branch workflows, feel free to skip to the ‘Best Practise’ subsection!
In the feature-branch workflow, you make use of the ease of creating new ‘branches’ with Git, parallel versions of your code that you can modify independently and easily merge back together.

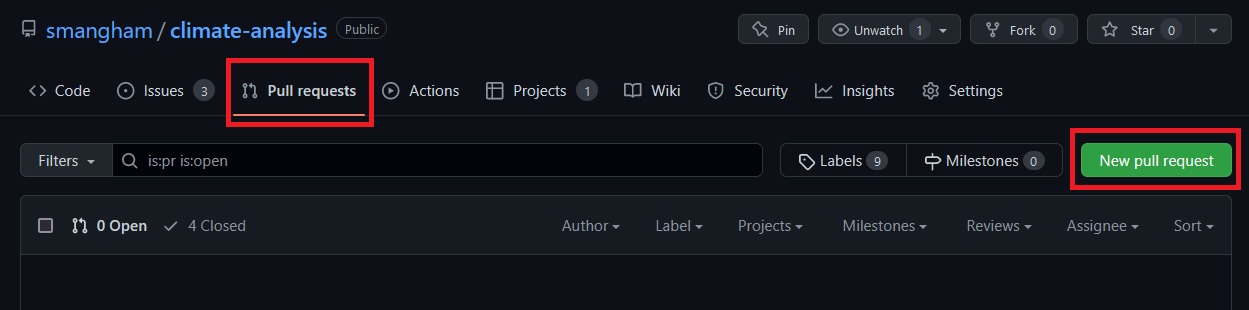
You have a master/main branch, that contains the stable version of the code you want to share with other people, and a dev/develop branch that holds the work-in-progress version of your code. When you have a version of your code that you’re going to use to generate results for a paper, or want to share with collaborators, then you can create a Pull request to merge the dev branch into master. We can go to our repository’s Pull requests tab, and click New pull request:
Whoops
You won’t be able to do this bit yourself - I forgot to ask you to check ‘Copy all branches’ during the template set-up step! This will be fixed in future versions of the material. For now, you can just read along.
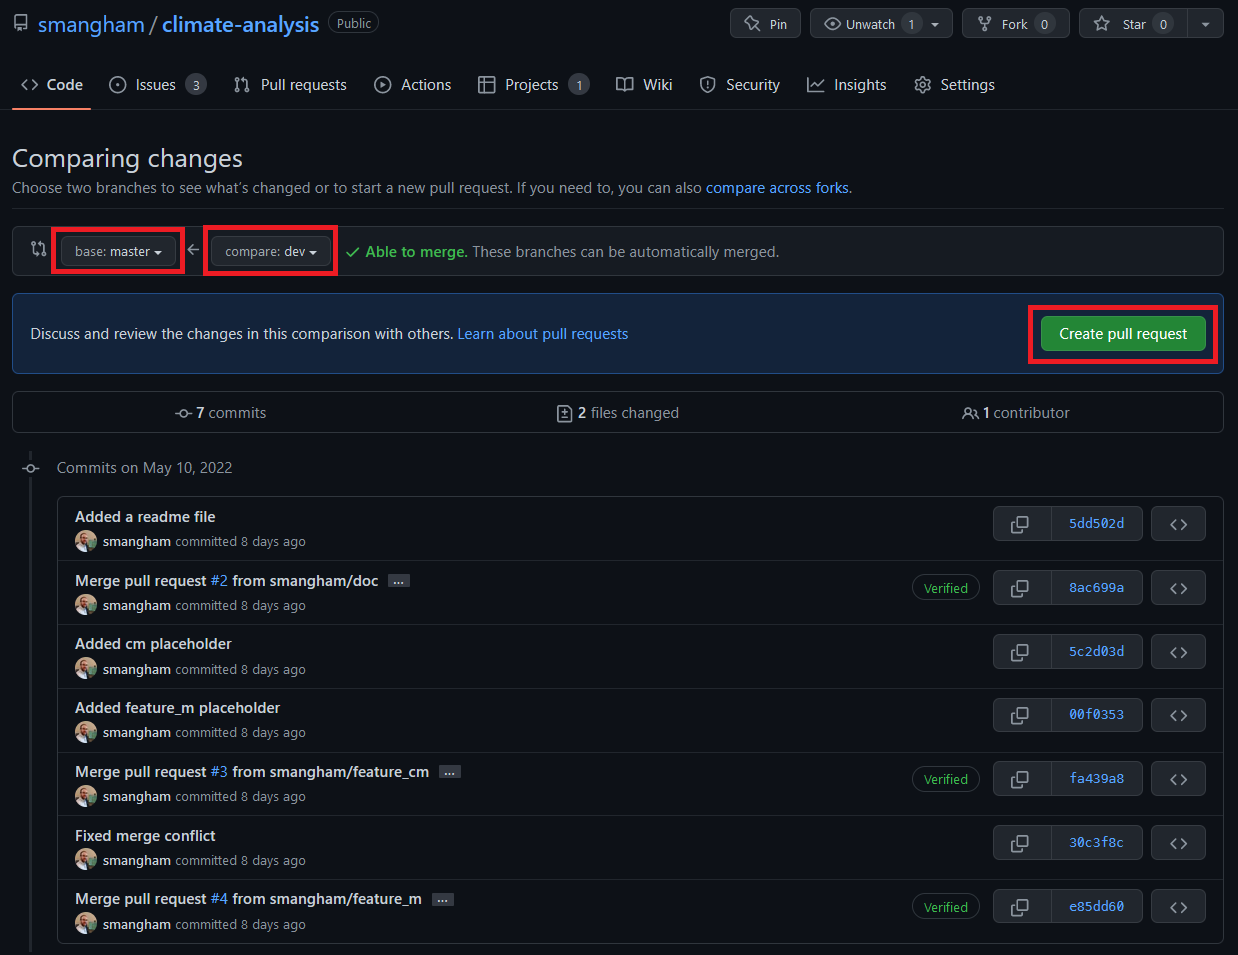
Then select the branches we want merged:
Now we’ve got a stable version of the code on the master branch that we can share with others, whilst we continue development independently.
We can take this one step further - and create new ‘feature’ branches for each bug we want to address and feature we want to add. Ideally, when we raise an issue, if it can’t be done in one commit and a few hours of work to fix and test we want to create a new feature branch, coming off of our dev branch, in which we work on it.
This makes it easy to work on multiple things at once - even if we’re half-way through adding a new feature on one branch, we can deal with a bug that a colleague has run into by creating a new branch coming off of dev, fixing the bug in that branch, and then doing a pull request to merge the fixes back into dev. If we weren’t using the feature-branch method and were working directly on dev, we’d have to finish and test our work on adding a new feature before we could fix the bug!
With the feature-branch workflow we can easily add new developers to our collaboration, and test new features in isolation to avoid confounding effects.
Best Practise
There’s some best practise associated with the workflow:
- When adding a new feature, use a feature branch, and test the feature in your feature branch.
- It’s OK to commit broken, work-in-progress code to a feature branch as it’s not expected to be ‘finished’ until you submit a pull request.
- Once your feature is tested and it’s ready to merge, submit a pull request to
dev. - Don’t commit broken, work-in-progress code to
dev! If someone wants to make a new branch, or fix a bug, they’ll be usingdevas a base, so it needs to work fine. - Only pull from
devtomasterwhen you thinkdevis stable. This is the version people will be downloading to verify the results from your papers.
In industry, there’s normally strict testing criteria for when you merge in feature branches or merge dev into master.
That’s a lot harder to apply in academia - in an experimental code, there is often no known ideal behaviour to test against,
and you expect your code’s output to change as you alter the equations and assumptions.
Forks
‘Forking’ a repository is similar to creating a new branch, but on a much larger scale- you create your own copy of the whole repository, that is linked back to the original.
For some large projects, or open-source projects, it’s not practical to have all the collaborators working on the same repository. Multiple different developers might both create branches with the same name, leading to conflicts, and developers can end up with access to dozens of work-in-progress branches they don’t know anything about. Others limit the ability of unauthorised users to push to the repository to prevent abuse, or accidental uploads of sensitive or restricted material. In these contexts, it makes more sense for every collaborator to have their own fork. Then, once they finish work on a feature branch, they can submit a pull request back to the original.
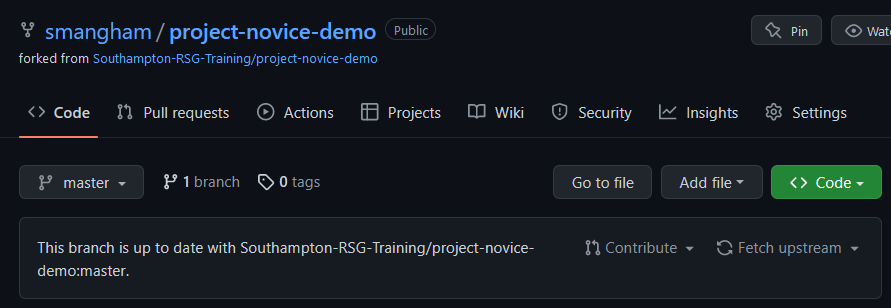
We’re going to create a fork of an existing repository - project-novice-demo. Go to the repository on GitHub, and click Fork. You can fork a repository to your own account, or any Team you have access to. For now, we’ll make a personal copy.

As you can see, the fork looks and works just like a normal repository, but handily tells you how far you are behind the original.
You may also be able to use forks to create modified versions of existing codes that better suit your needs, depending on their software license. It is good practise to submit your modifications and improvements back to the original, though.
Key Points
Projects are broken-down into self-contained tasks.
Tasks are represented as cards on a board.
Cards are arranged to show their status.
Issues can be added to project boards and labelled.
Project boards can show the priority of their tasks.
Forks are copies of entire repositories that can be synced up with the original.