Test Strategy, Planning, and Running Tests
Overview
Teaching: 30 min
Exercises: 20 minQuestions
Does the code we develop work the way it should do?
Can we (and others) verify these assertions for themselves?
To what extent are we confident of the accuracy of results that appear in publications?
Objectives
Explain the reasons why testing is important
Explain the differences between a test plan and a test strategy
List what’s typically included within a test case
Describe the benefits and drawbacks of manual and automated testing
Describe how unit tests can verify the correct behaviour of a program’s functions
Being able to demonstrate that a process generates the right results is important in any field of research, whether it’s software generating those results or not. For the sake of argument, if each line we write has a 99% chance of being right, then a 70-line program will be wrong more than half the time. We need to do better than that, which means we need to test our software to catch these mistakes.
What Is Software Testing?
So when writing software we need to ask ourselves some key questions:
- Does the code we develop work the way it should do?
- Can we (and others) verify these assertions for themselves?
- Perhaps most importantly, to what extent are we confident of the accuracy of results that appear in publications?
If we are unable to demonstrate that our software fulfills these criteria, why would anyone use it? Having a well-defined and regularly used test strategy, test plan and test cases can help give us and others confidence that our software works as expected.
Test Strategy vs Test Plans
There are two key aspects to consider before we start thinking about actual tests:
- A test plan defines the scope of what exactly is to be tested for a given piece of software, the objectives for testing, which tools or techniques will be used, how the software will be checked, and who will be involved. A test plan applies to a specific piece of software.
- A test strategy contains guiding principles for testing, that covers the testing process e.g. how testing will be done, which formats to be used for defining test cases and recording results, and how tests will be reported. This may apply to many software projects, although in smaller groups and projects the test strategy may be defined within the test plan itself.
The Test Case
The fundamental building block of testing itself is a test case, with test cases being run following the test plan. A project’s test cases are typically derived from the project’s specified requirements, so that if the software passes these tests it is said to fulfil those requirements.
Each test case covers the following information:
- A unique name or number to identify it
- The software feature(e) covered by the test case (specifying any specific requirements from which this feature is derived, e.g. SR1 or SR2)
- The input data to use for this test
- What needs to be done to ensure the software is in the correct state for the test
- How exactly to run the test with the input data
- The predicted result of running the test
When the test is run, the following are also noted (perhaps as an instance of the test plan, or within an issue on the code’s source repository:
- Date the test is run
- A description of the actual result
- Whether or not the test was successful (i.e. the actual result are equal to the predicted result)
- Which (if any) errors were discovered
When followed, testing enables those within any software development effort to verify the software is behaving correctly. Software, particularly within academic research, is prone to the need for change during its development, so a successfully executed test plan and set of test cases provides assurance that the software’s functionality continues to behave as intended despite these changes.
Design Tests for a New Feature
Look back at the Solution Requirements (SR1 or SR2) covered in the Principles of Software Engineering Lesson. Using the list of what tests cases should include above, write a couple of test cases that verify that the feature behaves as specified in the requirements. Feel free to make any assumptions you need to write the tests, but note them.
When considering test data, assume that the input data is a list of inflammation readings for each patient for each day of the trial, e.g. from a previous trial:
Patient A: 0, 0, 0, 0, 1, 8, 10, 14, 20, 14, 16, 13, 12, 9, 6, 3, 0, 0, 0, 0
Patient B: 0, 0, 0, 1, 4, 7, 10, 13, 15, 17, 12, 6, 4, 2, 0, 0, 0, 0, 0, 0
...
It may seem strange that we’re writing test cases for an implementation that doesn’t yet exist! However, this can prove a useful practice, since writing a test case is also defining what constitutes correct behaviour. By defining exactly what the output of an implementation should be in relation to its input, this becomes a behavioural contract which can be used to guide and test the writing of the implementation. This is known as test-driven development.
Solution
Test case ID: #1
Requirement: SR1
Input data: 0, 0, 0, 0, 1, 8, 10, 14, 20, 14, 16, 13, 12, 9, 6, 3, 0, 0, 0, 0
Prepare test: import mean_function from statistics_library
Run test: mean_function(input_data)
Expected result: 6.3
Test case ID: #2 Requirement: SR1 Input data: 0, 0, 0, 0, 1, 8, 10, 14, 20, 14, 16, 13, 12, 9, 6, 3, 0, 0, 0, 0 Prepare test: import stdev_function from statistics_library Run test: stdev_function(input_data) Expected result: 6.5505724940649275Assumptions
- Statistical functions are as named and located in
statistics_library.
Manual vs Automated Testing
We can and should extensively test our software manually, and it is a critical part of ensuring software functions correctly. It has the major benefit that the tester can observe the application during the actual test process, and interact with it as required to fulfill the test. As such, manual testing is also well-suited to testing aspects such as graphical user interfaces and reconciling visual outputs against inputs.
However, manual testing is often time consuming and prone to error. Another style of testing is automated testing, where we write code that tests the functions of our software. Since computers are very good and efficient at automating repetitive tasks, we should take advantage of this wherever possible.
On the other hand, automation enables us to define a potentially complex process in a repeatable way that is far less prone to error than manual approaches,and typically much faster. Once written, automated tests can be run many times, for instance whenever we change our code. And not just for ourselves: when others make use of your code, running these tests can help them build confidence in your code too.
Thus, once defined, automation can also save us a lot of effort, particularly in the long run. There are three main types of automated tests:
- Unit tests are tests for small and specific units of functionality, e.g. determining that a particular function returns output as expected given specific inputs.
- Functional or integration tests work at a higher level, and test functional paths through your code, e.g. given some specific inputs, a set of interconnected functions across a number of modules (or the entire code) produce the expected result. These are particularly useful for exposing faults in how functional units interact.
- Regression testing is kind of a special case of testing that makes sure that your program’s output and behaviour hasn’t changed. For example, after making changes to your code to add new functionality or fix a bug, you may re-run your unit or integration tests to make sure they haven’t broken anything. You may also add a new specific regression test to highlight if a particular bug has returned.
A collection of automated tests is often referred to as a test suite.
Testing: a Rule of Thumb
Overall, a good guiding principle behind testing is to fail fast. By prioritising the identification of failure – where unit testing can really help us – affords us the opportunity to find and resolve issues early, in particular, before they may lead to published results.
Example: Unit Testing
Let’s have a look at how we may structure test cases as unit tests, within a unit testing framework. In such a framework we define our tests we want to run as functions, and the framework automatically runs each of these functions in turn, summarising the outputs.
Most people don’t enjoy writing tests, so if we want them to actually do it, it must be easy to:
- Add or change tests
- Understand the tests that have already been written
- Run those tests, and
- Understand those tests’ results
Test results must also be reliable. If a testing tool says that code is working when it’s not or reports problems when there actually aren’t any, people will lose faith in it and stop using it.
Let’s assume we have some code that computes the factorial of a given number, for example in Python:
def factorial(n):
    """
    Calculate the factorial of a given number.

    :param int n: The factorial to calculate
    :return: The resultant factorial
    """
    if n == 0 or n == 1:
        return 1
    else:
        return  n * factorial(n-1)
So, factorial(3) will give us 6, factorial(5) gives us 120. You’ll notice we have also included a Python docstring at the head of the function, briefly describing what the function does, its input parameter, and what it returns, which is good practice.
Now let’s see what some unit tests might look like using an example Python unit testing framework:
from mymath.factorial import factorial

def test_factorial_3():
    assert factorial(3) == 6

def test_factorial_5():
    assert factorial(5) == 120

def test_factorial_10():
    assert factorial(10) == 3628800
Each of these test functions, in a general sense, is called a test case - these are a specification of:
- Inputs, e.g. the numbers we pass to our factorial function
- Execution conditions - what we need to do to set up the testing environment to run our test, e.g. in this case, we need to import the factorial function from our mymath source code. We could include this import statement within each test function, but since we are testing the same function in all of them, for brevity we’ll include it at the top of the script.
- Testing procedure, e.g. call our factorial function with an input number and confirm that it equals our expected output. Here, we use Python’s assert statement to do this, which will return false and fail the test if this condition does not hold
- Expected outputs, e.g. the numbers to which we compare the result of calling the factorial function
Note the very strong similarity between these aspects and the definition of test case we had earlier. And here, we’re defining each of these things for a test case we can run independently that requires no manual intervention.
Going back to our list of requirements, how easy is it to run these tests? Well, these tests are written to be used by a Python package called pytest. Pytest is a testing framework that allows you to write test cases using Python.
What About Unit Testing in Other Languages?
Other unit testing frameworks exist for Python, including Nose2 and Unittest, and the approach to unit testing can be translated to other languages as well, e.g. FRUIT for Fortran, JUnit for Java (the original unit testing framework), Catch for C++, etc.
Now we can run these tests using pytest:
$ python3 -m pytest

============================== test session starts ==============================
platform darwin -- Python 3.10.5, pytest-7.1.2, pluggy-1.0.0
rootdir: /Users/user/fac
collected 3 items

tests/test_factorial.py ...                                               [100%]

=============================== 3 passed in 0.01s ===============================
So what’s happening here? When started without any arguments, pytest does a number of things to look for tests you have written. By default, it will recursively check in directories (including the current one) for files that begin with test_ and end with .py, and if found, it looks for functions whose names also start with the letters test_ and runs each one. It will even find test methods matching the same pattern within classes beginning with Test. See the pytest documentation on good practices if you’d like to know more about how pytest finds tests, and other file layouts you can use to arrange your tests.
Notice the ... after our test script:
- If the function completes without an assertion being triggered, we count the test as a success (indicated as
.). - If an assertion fails, or we encounter an error, we count the test as a failure (indicated as F). The error is included in the output so we can see what went wrong.
If we have many tests, we essentially get a report indicating which tests succeeded or failed.
We can also use the -v argument to display the individual results of each test:
$ python3 -m pytest -v

============================== test session starts ==============================
platform darwin -- Python 3.10.5, pytest-7.1.2, pluggy-1.0.0 -- /Users/user/fac/venv/bin/python
cachedir: .pytest_cache
rootdir: /Users/user/fac
collected 3 items

tests/test_factorial.py::test_factorial_3 PASSED                          [ 33%]
tests/test_factorial.py::test_factorial_5 PASSED                          [ 66%]
tests/test_factorial.py::test_factorial_10 PASSED                         [100%]

=============================== 3 passed in 0.01s ===============================
Key Points
A test plan forms the foundation of any testing.
We should write tests to verify that functions generate expected output given a set of specific inputs.
The three main types of automated tests are unit tests, functional tests and regression tests.
We can use a unit testing framework like
pytestto structure and simplify the writing of tests.Testing program behaviour against both valid and invalid inputs is important and is known as data validation.
Development Tools
Overview
Teaching: 15 min
Exercises: 5 minQuestions
Are there any tools that can help make software development easier?
How can I locate faults in my code?
Objectives
Explain what an Integrated Development Environment (IDE) is.
Describe the common features of IDEs.
Describe the process of using a debugger to find faults in programs.
As we have already seen, even a simple software project is typically split into smaller functional units and modules which are kept in separate files and subdirectories. As your code starts to grow and becomes more complex, it will involve many different coding-related files and external libraries, and using otherwise useful editing tools like Nano may prove limited. To help you manage this complexity, Integrated Development Environments (or IDEs) present helpful development tools and visualisation aids to help make writing code easier and more productive. We’ll also take a closer look at debugging, a tool common to IDEs and very useful development technique for finding coding errors as programs are running.
Integrated Development Environments (IDEs)
An IDE normally consists of at least a source code editor, build automation tools (for compiling or assembling code into a form to run or distribute to others) and a debugger. The boundaries between modern IDEs and other aspects of the broader software development process are often blurred, as nowadays IDEs also offer version control support, tools to construct graphical user interfaces (GUI) and web browser integration for web app development, source code inspection for dependencies and many other useful functionalities.
The following is a list of the most commonly seen IDE features:
- Syntax highlighting: to show programming language constructs, keywords and the syntax errors with visually distinct colours and font effects
- Code completion: to speed up programming by offering a set of possible (syntactically correct) code options
- Code search: finding package, class, function and variable declarations, their usages and referencing
- Version control support: to quickly add and commit new changes to source code repositories, without the need to use the command line
- Debugging: the ability to inspect the state of a program and its variables as it runs by pausing (and stepping through) it’s code line by line
IDEs are extremely useful and modern software development would be very hard without them. For example, there are a number of IDEs available for Python development; a good overview is available from the Python Project Wiki.
Code editors can be as simple as a text editor with syntax highlighting and code formatting capabilities, but many also have features common to full IDEs, such as code execution and debugging, and some can also interact with a version control system. Compared to an IDE, a good dedicated code editor is usually smaller and quicker, but often less feature-rich. You will have to decide which one is the best for you.
Some examples of IDEs and code editors available for Windows, Linux and Mac OS:
- JetBrains PyCharm, a free, comprehensive, open source Python IDE with many powerful features including the ones listed above.
- Eclipse, one of the most popular IDEs used for development of C/C++, JavaScript, PHP and other languages.
- Apache Netbeans, a popular IDE for Java development, but also for JavaScript, PHP, HTML5, and others.
- Microsoft Visual Studio Code, a popular and free Microsoft code editor which is more lightweight with a gentler learning curve than IDEs like PyCharm, but still has many useful features including code completion, syntax highlighting, debugging, and version control support. It’s also able to work with many different programming languages.
Visual Studio Code: an Example
A typical IDE gives you an interface that looks something like this (taken from Microsoft’s Visual Studio Code):
On the left there’s a file navigator, allowing you see and select files for editing. The right side is dedicated to the IDE’s code editor, presenting code that typically colour-highlights the code’s syntax - and potentially any formatting errors in your code. The code editor may have many files open at once. In the top right above the code editor there are buttons allowing you to run the code directly or within a debugger, another to show you any changes from the last version committed to its version control repository, and one to duplicate the current code editing view, which is handy if you need to see one part of the file whilst editing another.
So the key benefit is that features that help deal with common software development tasks are within easy reach, and integrated within a single application with the aim to increase how productive you can be when writing software.
Using a Debugger to Find Code Problems
Testing can tell us something is wrong in our code and give a rough idea of where the error is by which test(s) are failing. But it does not tell us exactly where the problem is (i.e. what line of code), or how it came about. To give us a better idea of what is going on, we can:
- Output program state at various points, e.g. by using print statements to output the contents of variables,
- Use a logging capability to output the state of everything as the program progresses, or
- Look at intermediately generated files.
But such approaches are often time consuming and sometimes not enough to fully pinpoint the issue. In complex programs, like simulation codes, we often need to get inside the code while it is running and explore. This is where using a debugger can be useful. You can think of debugging like performing exploratory surgery, but on code. Debuggers allow us to peer at the internal workings of a program, such as variables and other state, as it performs its functions.
PyCharm: a Debugging Example
Let’s look at a different IDE for an example of debugging - PyCharm.
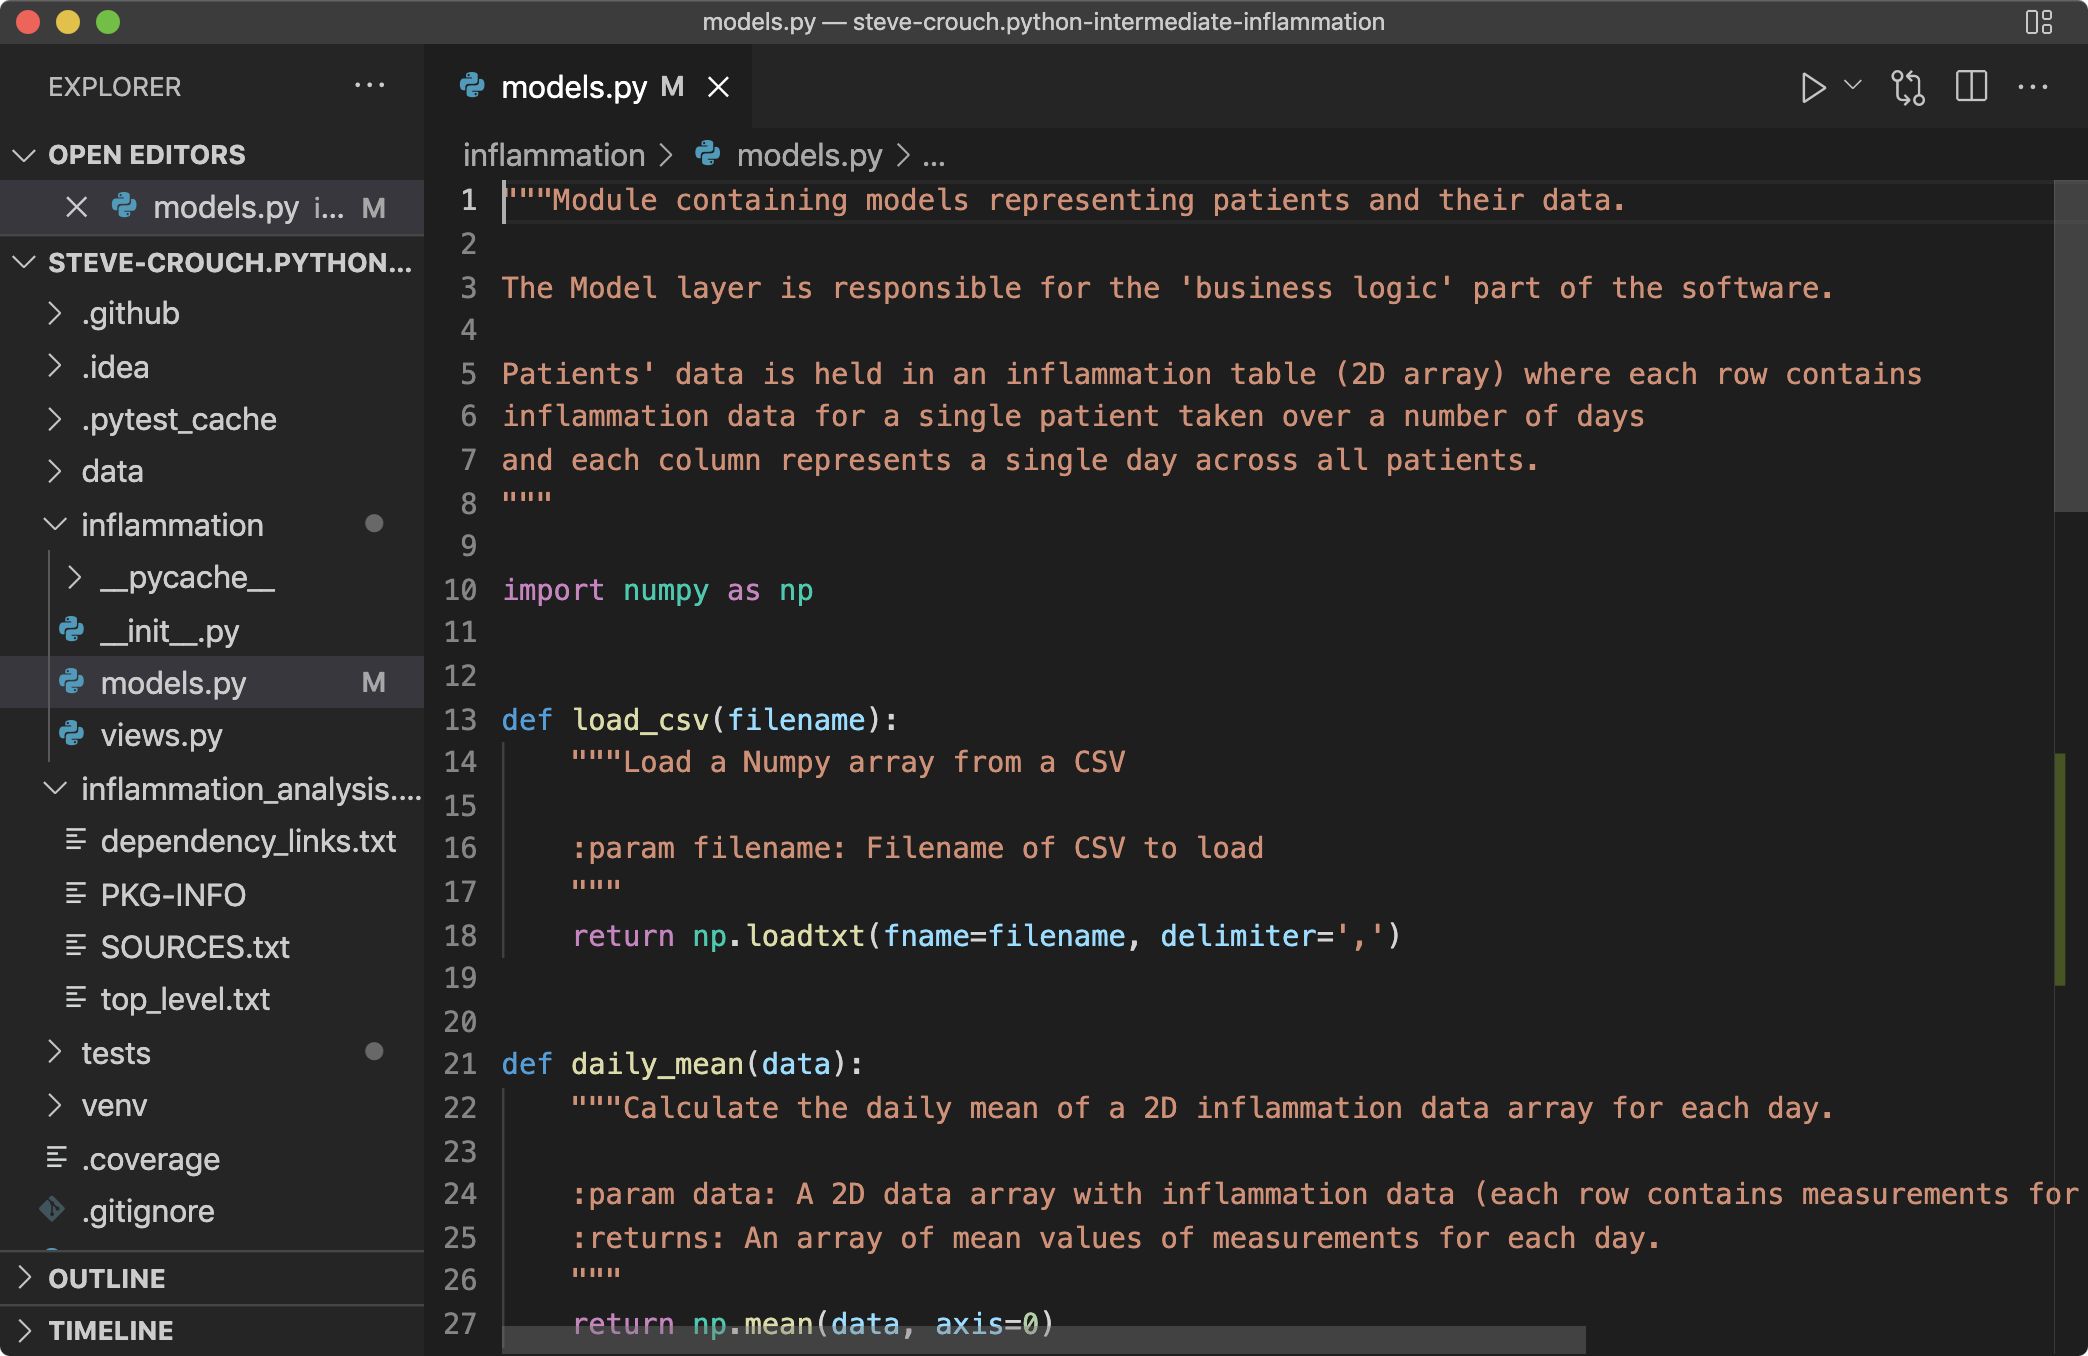
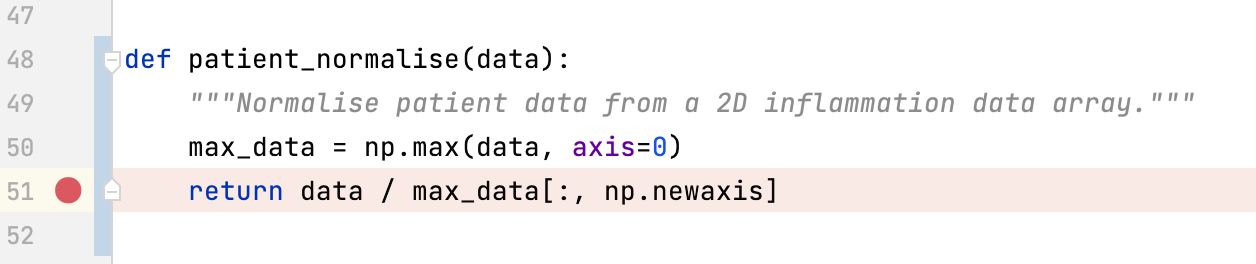
Let’s assume we want to use the debugger to investigate what is happening inside a particular function called patient_normalise. To do this we will add a breakpoint in the code. A breakpoint will pause execution at that point allowing us to explore the state of the program:
Note the similarity in layout with Visual Studio Code - with the file navigation on the left, code editor on the right, and other controls at the top which is very typical of IDEs.
Once we run the code within PyCharm’s debugger, two sections appear that looks something like the following:
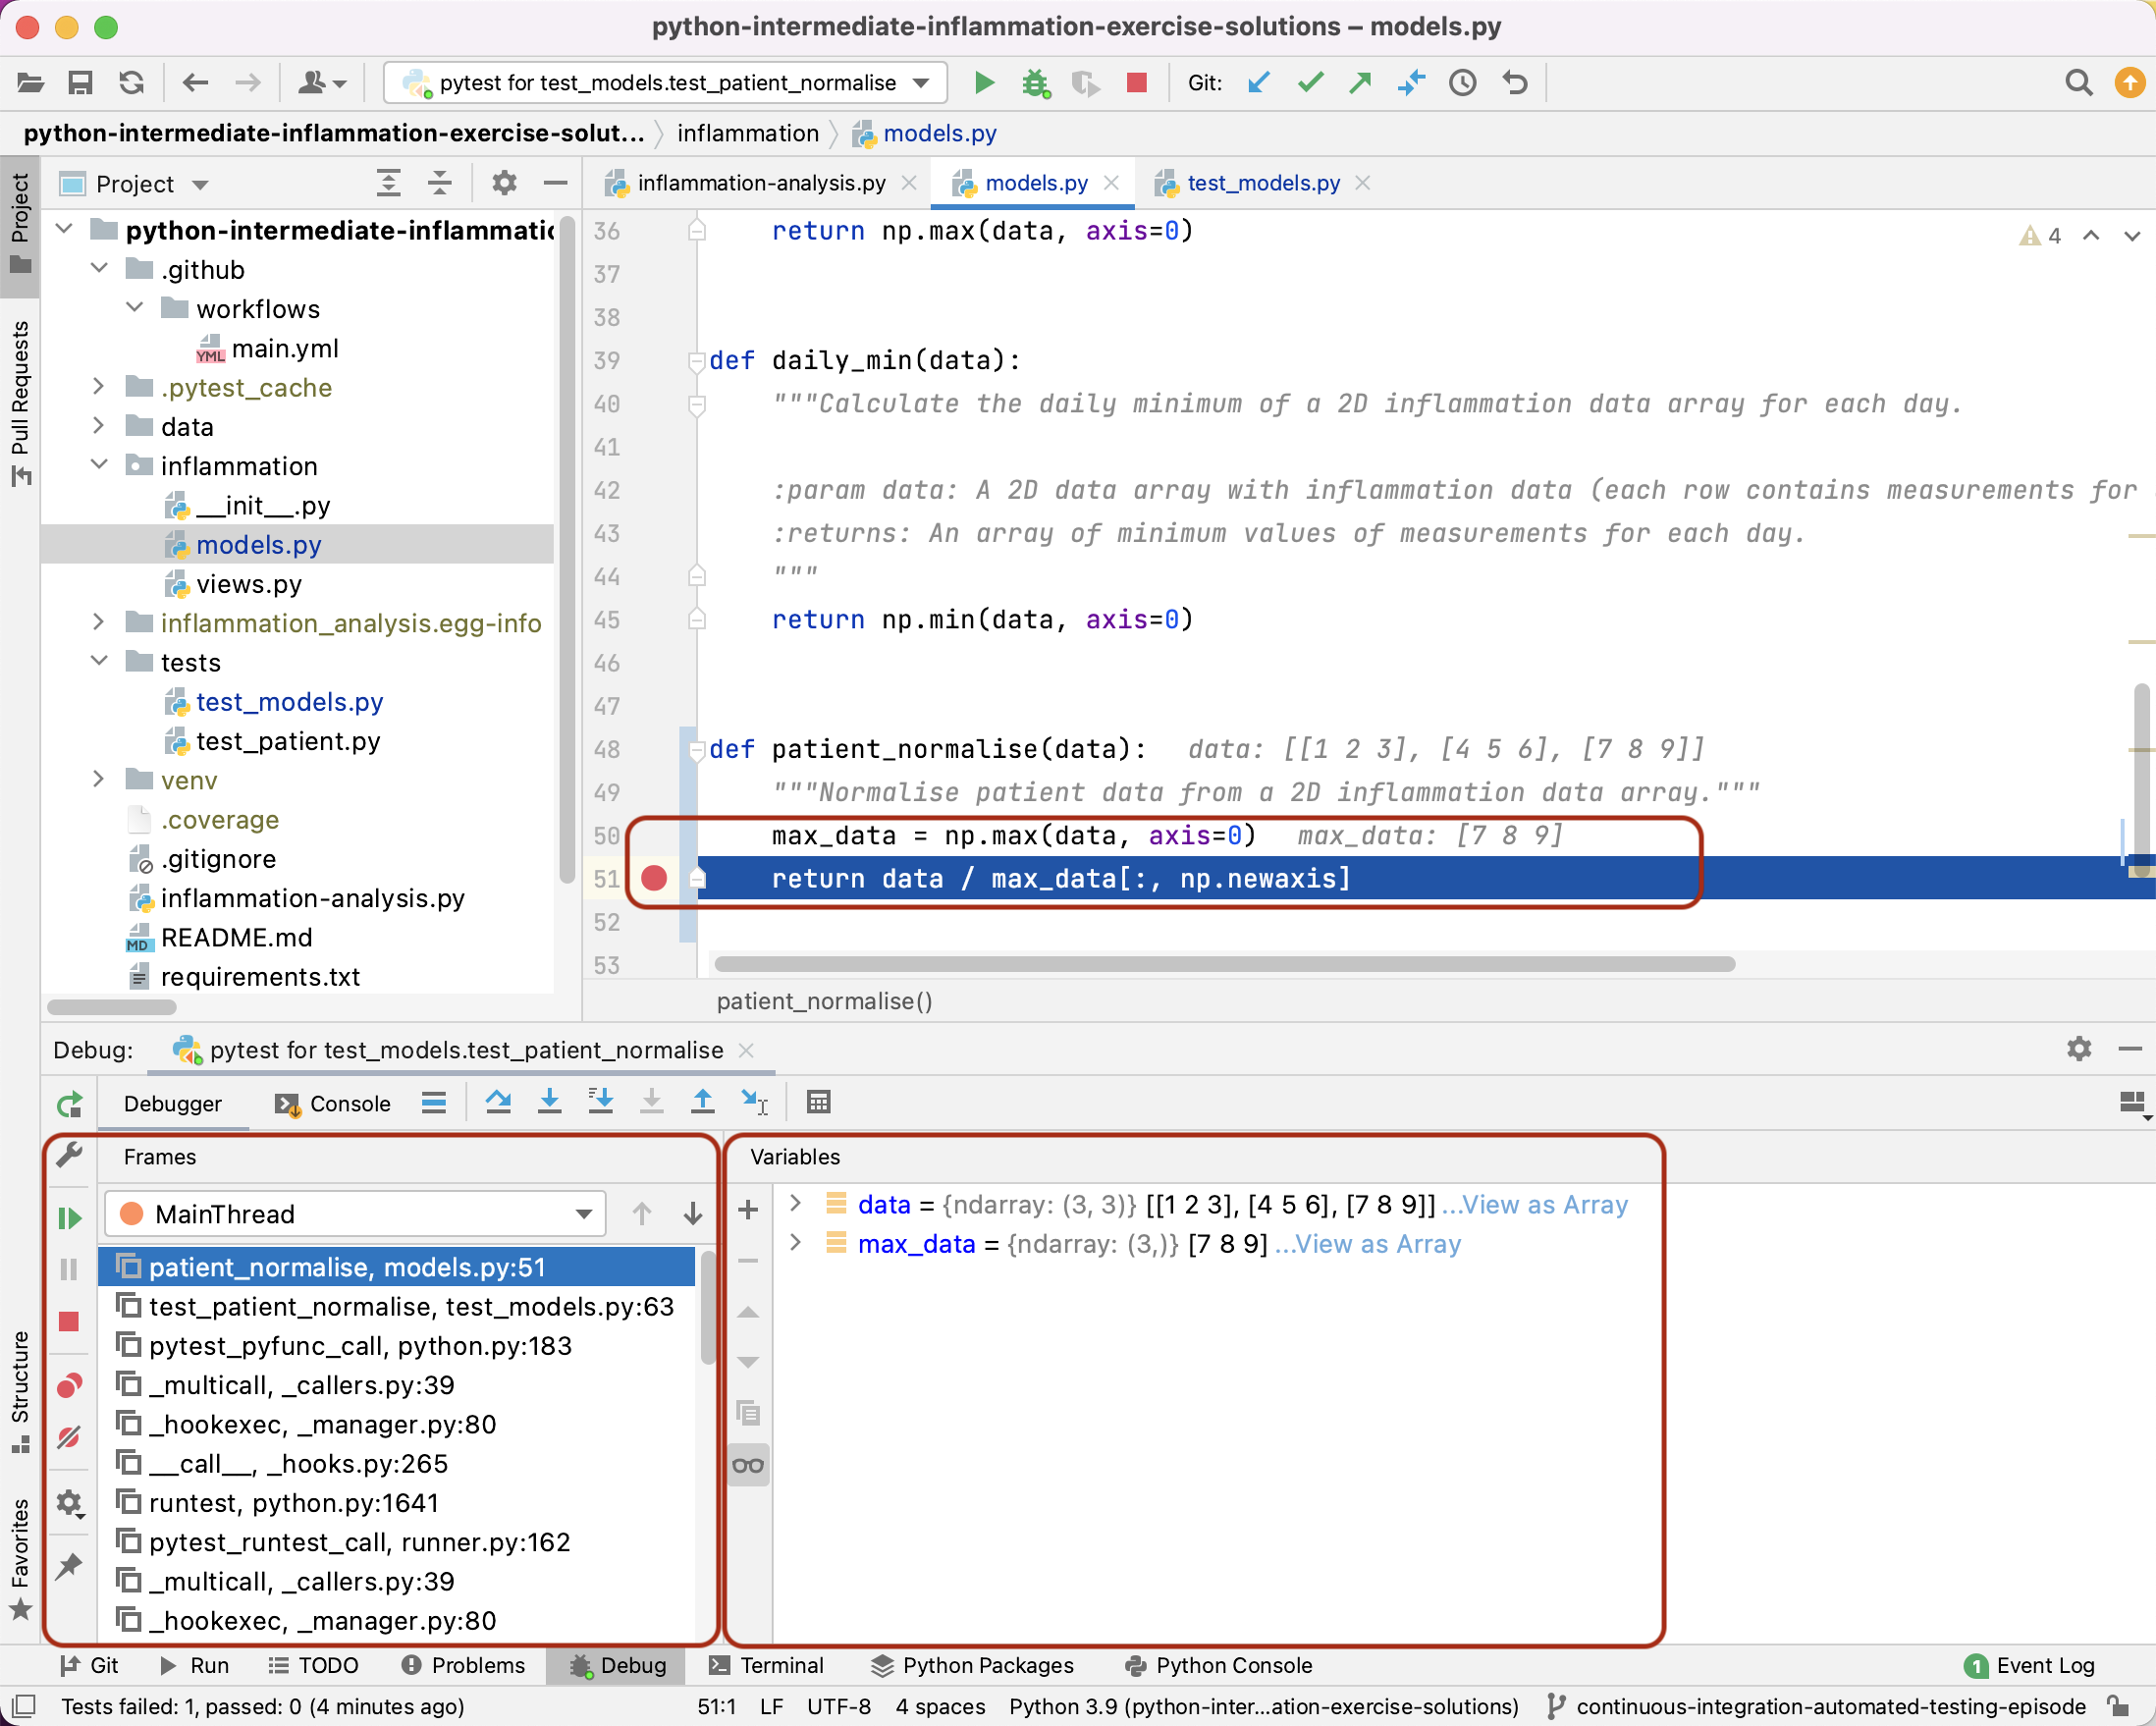
- The
Framessection on the left, which shows the call stack (the chain of functions that have been executed to lead to this point). We can traverse this chain of functions if we wish, to observe the state of each function. - The
Variablessection on the right, which displays the local and global variables currently in memory which we can select to observe their current state.
We can also continue execution of the program at this point, until another breakpoint is reached or the program ends, or even step through the code one statement at a time. This gives us very fine-grained control of our program, as we attempt to diagnose any problems, and is incredibly useful when we need to know precisely what is happening when faults appear.
Which One is for You?
Have a think about the different types of editors and IDEs we’ve discussed. Which one seems the right fit for you?
Key Points
IDEs provide tools and features to help develop increasingly complex code.
Debuggers allow you to set breakpoints which pause running code so its state can be inspected.
A call stack is a chain of functions that have been executed prior to a certain point.
Reviewing Code
Overview
Teaching: 10 min
Exercises: 20 minQuestions
How can others help me improve my code?
List the benefits of code reviews.
Explain what happens in a code review.
Describe some approaches to help run an effective code review.
So far in this course we’ve focused on learning software design and (some) technical practices, tools and infrastructure that help the development of software. We’ve also looked at developing tests to check our code which is one way to reassure ourselves and others that our code behaves as intended. But what about the perspectives of other people, such as others in our lab group or development team, and importantly, how about any key collaborators or end users of our software?
In this episode we’ll look at the benefits of review - by others in our team looking at our code from a developer’s perspective, and (at a higher level) by key stakeholders reviewing the software from an end-user’s perspective.
Code Review
As we’ve already mentioned, a good rule of thumb is to assume that others - including a future version of yourself - will look at our code. Code review brings that process forward, by having members of our team, lab, or other collaborators, review parts of our code and provide feedback. Note that we didn’t mention reviewing all the code: code reviews are most effective and efficient when they focus on the most important parts that are critical to the software’s functions.
What are the Benefits of Code Review?
An effective code review:
- Prevents errors from creeping into your software by improving code quality at an early stage of the software development process
- Provides developers with feedback from more senior developers to improve their own coding practices and expertise
- Helps with learning, i.e. sharing knowledge about the codebase, solution approaches, expectations regarding quality, coding standards, etc.
- Helps increase the sense of collective code ownership and responsibility of code, which in turn helps increase the “bus factor” and reduce the risk or having a single person “responsible” for a certain part of the codebase
According to Michael Fagan, the author of the code inspection technique, rigorous inspections can remove 60-90% of errors from the code even before the first tests are run (Fagan, 1976).
How to do a Code Review?
There are many ways to accomplish an effective code review. It could be in an informal meeting between two people at a desk, with the code writer leading another through a portion of code, explaining its intent and the rationale for decisions made within the implementation, or it could be done within a larger setting, with the same goals but perhaps with a few colleagues or developers and the code writer presenting from a projector.
Here are some things to consider to get the most out of a code review (see blogs from Swarmia and Smartbear for more details):
- Decide the focus of a code review: are you reviewing overall code design, a module’s code or tests, a set of key changes across a codebase, or considering a particular code issue and how to solve it?
- Do not review for too long in one sitting: according to Best Kept Secrets of Peer Code Review (Cohen, 2006), the first hour of review matters the most as detection of defects significantly drops after this period. Studies into code review also show that you should not review more than 400 lines of code at a time. Conducting more frequent shorter reviews seems to be more effective.
- Focus on important parts of the code: to be efficient, reserve code review for critical portions of code.
- Communicate clearly and effectively: when reviewing code, be explicit about the action you request from the author.
- Foster a positive feedback culture: ensure give feedback about the code, not about the author, and accept that there are multiple correct solutions to a problem. Sandwich criticism with positive comments and praise to keep the review positive.
Tool-assisted Code Review
Another way to accomplish code reviews is via a tool-assisted code review. Instead of undertaking a code review with others physically present, a tool is used to facilitate the process of code review. These tools can help by displaying what code files have changed and require review, and facilitating a conversation between team members (in the role of developer and reviewer). GitHub, for example, has a pull request feature on its code repositories, an increasingly popular method of delegating the task of review to others. The name pull request suggests you are requesting that your changes are accepted into the repository.
With a pull request, changes are made to a source code repository in the form of commits that are then submitted as a pull request to the repository. These pull requests highlight the code changes from the commits and can be delegated to and reviewed by others, who have an opportunity to insert comments on the changes into their review. Once any reviews are submitted, a decision can then be made as to whether these changes can be integrated into the code base or rejected, at which point the pull request has served its purpose.
Action Stations!
Take a look at the GitHub code repository at https://github.com/softwaresaved/rf4. Examine the contents of the repository (code, documentation, other assets) and consider what you think needs to be improved in order for you to use it successfully. What would make it difficult to install and use? What would be the top two things you would address first and why?
Solution
Repository itself
- Repo name is unhelpful rf4
- The README.md mentions this code has been developed since 2010, but the commits indicate it’s only just been committed to GitHub
- LICENSE file is empty
- Commits with cursory commit messages (e.g. ‘Change’, ‘Not working’)
- Code is not in a working state on master branch - developing code should either be on a separate branch, or file releases made available with versions
- No tests
- GitHub has highlighted potential security vulnerabilities with the repo’s dependencies
README.md
- No prerequisites
- No instructions for running the code
- No description of the data used by the software that is in the repository
- Incomplete description of the repository data directory
- Links to blog post that isn’t there
What questions do we want to answer with this data?
- No real content, comment that says it’ll be finished later
Code
- Arbitrary copy of the .py with a _working suffix, no explanation
- Many function docstrings missing (including key functions)
- Inconsistent commenting of logger throughout
- Logger retrieved in each function (and sometimes not used), when it could be done once and referenced later
- Hard coded file path references inline
- print(len(df)) with no context, comment - why isn’t it logged?
- Commenting good in places, nonexistent commenting in others
- Many variable names are non-descriptive single letters
- The code doesn’t work! (df renamed to df47 in main()
- The main() function is overlong and uncommented
- Commented out function
- Two functions have a number in the function name without explanation
- Too many spaces in add_column5 function inconsistent with coding style
- Some ultra-long code lines that should be properly formatted over multiple lines
What about a Good Example?
If you’d like to take a look at a “good” GitHub Python repository which embodies the use of many best practices, take a look at the one for the heavily used Python Requests library.
Key Points
Code review is where at least one other person looks at parts of a codebase in order to improve its code readability, understandability, quality and maintainability.
The first hour of code review matters the most.
Documenting Code
Overview
Teaching: 30 min
Exercises: 20 minQuestions
How should we document and license our code?
Objectives
Explain why documentation is important
Describe the minimum components of software documentation to aid reuse
Create a repository README file to guide others to successfully reuse a program
Understand other documentation components and where they are useful
Describe the basic types of open source software licence
In previous episodes we’ve looked at what tools and techniques can help us design and develop good software for research. In this lesson we’ll be looking at how we can document our software to ease reusability for others - including future versions of ourselves.
Documenting Code to Improve Reusability
Reproducibility is a cornerstone of science, and scientists who work in many disciplines are expected to document the processes by which they’ve conducted their research so it can be reproduced by others. In medicinal, pharmacological, and similar research fields for example, researchers use logbooks which are then used to write up protocols and methods for publication.
Many things we’ve covered so far contribute directly to making our software reproducible - and indeed reusable - by others. A key part of this we’ll cover now is software documentation, which is ironically very often given short shrift in academia. This is often the case even in fields where the documentation and publication of research method is otherwise taken very seriously.
A few reasons for this are that writing documentation is often considered:
- A low priority compared to actual research (if it’s even considered at all)
- Expensive in terms of effort, with little reward
- Writing documentation is boring!
A very useful form of documentation for understanding our code is code commenting, and is most effective when used to explain complex interfaces or behaviour, or the reasoning behind why something is coded a certain way. But code comments only go so far.
Whilst it’s certainly arguable that writing documentation isn’t as exciting as writing code, it doesn’t have to be expensive and brings many benefits. In addition to enabling general reproducibility by others, documentation…
- Helps bring new staff researchers and developers up to speed quickly with using the software
- Functions as a great aid to research collaborations involving software, where those from other teams need to use it
- When well written, can act as a basis for detailing algorithms and other mechanisms in research papers, such that the software’s functionality can be replicated and re-implemented elsewhere
- Provides a descriptive link back to the science that underlies it. As a reference, it makes it far easier to know how to update the software as the scientific theory changes (and potentially vice versa)
- Importantly, it can enable others to understand the software sufficiently to modify and reuse it to do different things
In the next section we’ll see that writing a sensible minimum set of documentation in a single document doesn’t have to be expensive, and can greatly aid reproducibility.
What Makes Good Documentation?
Consider software you’ve used or developed in the past, where you’ve needed to refer to documentation. Which pieces of software had good documentation, and what made it good?
Writing a README
A code’s README file, the very first piece of documentation people see when visiting a GitHub code repository for example, is the first piece of documentation (perhaps other than publications that refer to it) that people should read to acquaint themselves with the software. It concisely explains what the software is about and what it’s for, and covers the steps necessary to obtain and install the software and use it to accomplish basic tasks. Think of it not as a comprehensive reference of all functionality, but more a short tutorial with links to further information - hence it should contain brief explanations and be focused on instructional steps to get people started.
How to Create a GitHub Repository README file?
If you’re looking to write your own README for a GitHub repository, create a
README.mdfile in the root directory of your repository. The.mdindicates this is a markdown file, a lightweight markup language which is basically a text file with some extra syntax to provide ways of formatting them. A big advantage of them is that they can be read as plain-text files or as source files for rendering them with formatting structures, and are very quick to write. GitHub provides a very useful guide to writing markdown for its repositories.
As an example, let’s consider a README file for our clinical trial system we looked at in earlier lessons, written in GitHub markdown.
# Inflam
So here, we’re giving our software a name. Ideally something unique, short, snappy, and perhaps to some degree an indicator of what it does. We would ideally rename the repository to reflect the new name, but let’s leave that for now. In markdown, the # designates a heading, two ## are used for a subheading, and so on. The Software Sustainability Institute guide on naming projects and products provides some helpful pointers.
We should also add a short description.
Inflam is a data management system written in Python that manages trial data used in clinical inflammation studies.
To give readers an idea of the software’s capabilities, let’s add some key features next:
## Main features

Here are some key features of Inflam:

- Provide basic statistical analyses over clinical trial data
- Ability to work on trial data in Comma-Separated Value (CSV) format
- Generate plots of trial data
- Analytical functions and views can be easily extended based on its Model-View-Controller architecture
As well as knowing what the software aims to do and its key features, it’s very important to specify what other software and related dependencies are needed to use the software (typically called dependencies or prerequisites):
## Prerequisites

Inflam requires the following Python packages:

- [NumPy](https://www.numpy.org/) - makes use of NumPy's statistical functions
- [Matplotlib](https://matplotlib.org/stable/index.html) - uses Matplotlib to generate statistical plots

The following optional packages are required to run Inflam's unit tests:

- [pytest](https://docs.pytest.org/en/stable/) - Inflam's unit tests are written using pytest
- [pytest-cov](https://pypi.org/project/pytest-cov/) - Adds test coverage stats to unit testing
Here we’re making use of markdown links, with some text describing the link within [] followed by the link itself within ().
That’s got us started, but there are other aspects we should also cover:
- Installation/deployment: step-by-step instructions for setting up the software so it can be used
- Basic usage: step-by-step instructions that cover using the software to accomplish basic tasks
- Contributing: for those wishing to contribute to the software’s development, this is an opportunity to detail what kinds of contribution are sought and how to get involved
- Contact information/getting help: which may include things like key author email addresses, and links to mailing lists and other resources
- Credits/Acknowledgements: where appropriate, be sure to credit those who have helped in the software’s development or inspired it
- Citation: particularly for academic software, it’s a very good idea to specify a reference to an appropriate academic publication so other academics can cite use of the software in their own publications and media. You can do this within a separate CITATION text file within the repository’s root directory and link to it from the markdown
- Licence: a short description of and link to the software’s licence
For more verbose sections, there are usually just highlights in the README with links to further information, which may be held within other markdown files within the repository or elsewhere.
We’ll finish these off later. See Matias Singer’s curated list of awesome READMEs for inspiration.
Other Documentation
There are many different types of other documentation you should also consider writing and making available that’s beyond the scope of this course. The key is to consider which audiences you need to write for, e.g. end users, developers, maintainers, etc., and what they need from the documentation. There’s a Software Sustainability Institute blog post on best practices for research software documentation that helpfully covers the kinds of documentation to consider and other effective ways to convey the same information.
One that you should always consider is technical documentation. This typically aims to help other developers understand your code sufficiently well to make their own changes to it, which could include other members in your team (and as we said before, also a future version of yourself). This may include documentation that covers:
- Software’s architecture/design, including the different components and how they fit together and database design (if a database is used)
- API (Application Programmer Interface) documentation that describes the interface points designed into your software for developers to use, e.g. for a software library
- Technical tutorials or ‘how tos’ to accomplish developer-oriented tasks, such as compiling or building the code, development environments, or how to extend or modify the code in particular ways
Of course, this all takes effort, and good and correct documentation requires that it is updated to keep in line with changes in the software which takes further effort. What’s important is to consider what is needed and most helpful to other users and developers of the code: what problems will they (or do they) typically face when using the software? What needs explanation? What types of documentation should be written first?
Improving Documentation
Thinking again about software you’ve used or developed in the past, how could its usability have improved by additional documentation or changes to the existing documentation? What changes would you make?
Choosing an Open Source Licence
Software licensing can be a whole course in itself, so we’ll just summarise here. Your institution’s Intellectual Property (IP) team will be able to offer specific guidance that fits the way your institution thinks about software.
In IP law, software is considered a creative work of literature, so any code you write automatically has copyright protection applied. This copyright will usually belong to the institution that employs you, but this may be different for PhD students. If you need to check, this should be included in your employment / studentship contract or talk to your university’s team that deals with intellectual property.
Since software is automatically under copyright, without a licence no one may:
- Copy it
- Distribute it
- Modify it
- Extend it
- Use it (actually unclear at present - this has not been properly tested in court yet)
Fundamentally there are two kinds of licence, Open Source licences and Proprietary licences, which serve slightly different purposes:
- Proprietary licences are designed to pass on limited rights to end users, and are most suitable if you want to commercialise your software. They tend to be customised to suit the requirements of the software and the institution to which it belongs - again your institutions IP team will be able to help here.
- Open Source licences are designed more to protect the rights of end users - they specifically grant permission to make modifications and redistribute the software to others. The website Choose A License provides recommendations and a simple summary of some of the most common open source licences.
Within the open source licences, there are two categories, copyleft and permissive:
- The permissive licences such as MIT and the multiple variants of the BSD licence are designed to give maximum freedom to the end users of software. These licences allow the end user to do almost anything with the source code.
- The copyleft licences such as the GNU General Public License (GPL) still give a lot of freedom to the end users, but any code that they write based on GPLed code must also be licensed under the same licence. This gives the developer assurance that anyone building on their code is also contributing back to the community. It’s actually a little more complicated than this, and the variants all have slightly different conditions and applicability, but this is the core of the licence.
Which of these types of licence you prefer is up to you and those you develop code with. If you want more information, or help choosing a licence, the Choose An Open-Source Licence or tl;dr Legal sites can help.
What if software doesn’t have a licence?
It’s a common misconception, but if a piece of software does not have a licence, it generally means others have no permissions from the software’s creators to use, modify, or share the software. Simply that the code is freely and openly available is not enough - without a license, the software is not (in a legal sense) usable by others.
What is a Version Number Anyway?
Software version numbers are everywhere, and there are many different ways to do it. A popular one to consider is Semantic Versioning, where a given version number uses the format MAJOR.MINOR.PATCH. You increment the:
- MAJOR version when you make incompatible API changes
- MINOR version when you add functionality in a backwards compatible manner
- PATCH version when you make backwards compatible bug fixes
You can also add a hyphen followed by characters to denote a pre-release version, e.g. 1.0.0-alpha1 (first alpha release) or 1.2.3-beta4 (fourth beta release).
Key Points
A huge contributor to the ability to reuse any software is documentation.
Having only a short documentation document that covers the basics for getting the software up and running goes a long way, and can be amended and added to later.
Documentation helps make your code reproducible.
By default, software code released without a licence conveys no rights for reuse.
Open source licences fall into two key categories: copyleft and permissive.
Survey
Overview
Teaching: min
Exercises: minQuestions
Objectives
Key Points